![Инстаграм Блог - Исправьте свои проблемы [Советы и рекомендации]](https://wikigeneral.net/wp-content/uploads/2023/05/cropped-Инстаграм-Блог-Исправьте-свои-проблемы-Советы-и-рекомендации.webp)
Are you frustrated by your Samsung Galaxy S20 battery draining quickly or failing to hold a charge? It might be time to replace the battery. In this comprehensive guide, we’ll walk you through each step of the battery replacement process, ensuring you can restore your Galaxy S20’s battery life and keep it running smoothly.
Assessing the Battery Problem:
Before diving into the replacement process, it’s essential to assess the battery problem accurately. Common signs of a failing battery include rapid battery drain, difficulty charging, or unexpected shutdowns. If you’re experiencing any of these issues, a battery replacement may be necessary to restore your Galaxy S20’s performance.
Tools Needed:
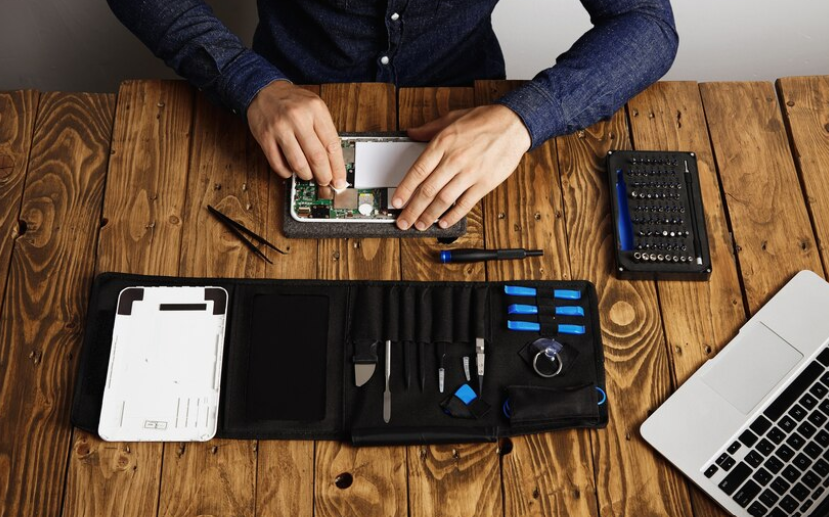
To replace the battery in your Samsung Galaxy S20, you’ll need a few essential tools.
- Replacement Battery: Ensure you have a replacement battery specifically designed for the Samsung Galaxy S20.
- Phillips Screwdriver: Obtain a small Phillips screwdriver to handle the screws securing the battery.
- Plastic Prying Tool or Guitar Pick: Use a plastic prying tool or a guitar pick to carefully pry apart the components without causing damage.
- Adhesive Strips or Double-Sided Tape: Prepare adhesive strips or double-sided tape to reattach components after replacement.
- Heat Gun or Hair Dryer: Utilize a heat gun or a hair dryer to soften adhesive for easier removal of components.
Preparation:
Before starting the battery replacement process, it’s crucial to prepare your Galaxy S20. Begin by powering off the device and removing the SIM card tray. This ensures the safety of both you and your device during the replacement process.
Removing the Back Cover:
The back cover of the Galaxy S20 is secured with adhesive, making it necessary to loosen the adhesive before removal. Use a heat gun or hair dryer to gently warm the back cover, softening the adhesive and making it easier to detach. Once the adhesive is loosened, carefully insert a plastic prying tool or guitar pick into the seam between the back cover and the device. Slowly work your way around the edges, gradually separating the back cover from the Galaxy S20’s frame,
Disconnecting Components:
With the back cover removed, you’ll gain access to the internal components of the Galaxy S20. Before proceeding further, it’s essential to disconnect the battery connector and any other components that may interfere with the battery removal process. Take care to note the location of each connector to ensure proper reassembly later.
Removing the Battery:
Once the necessary components are disconnected, you can begin removing the old battery from your Galaxy S20. Start by loosening the screws securing the battery bracket in place. Once the screws are removed, carefully lift the battery bracket from the device, exposing the battery underneath. The battery is typically held in place with adhesive, so gently pry it away from the device using a plastic prying tool or guitar pick. Take care not to damage any surrounding components during this process.
Installing the New Battery:
With the old battery removed, it’s time to install the new battery in your Galaxy S20. Begin by positioning the new battery in the same location as the old battery, ensuring it sits flush against the device’s frame. Once in place, secure the battery with adhesive strips or double-sided tape, ensuring it remains firmly attached to the device. Next, reconnect the battery connector and any other components that were disconnected earlier.
Reassembling the Device:
With the new battery installed, it’s time to reassemble your Samsung Galaxy S20. Start by replacing the battery bracket and securing it with the screws removed earlier. Once the bracket is in place, carefully reattach the back cover, ensuring it fits snugly against the device’s frame. Apply gentle pressure around the edges to reseal the adhesive and ensure a secure fit. Finally, insert the SIM card tray back into the device.
Testing:
Before completing the battery replacement process, it’s essential to test your Galaxy S20 to ensure everything is functioning correctly. Power on the device and monitor its performance, paying particular attention to the battery life and charging capabilities. If everything appears to be in working order, congratulations – you’ve successfully replaced the battery in your Samsung Galaxy S20!
Conclusion:
If your Samsung Galaxy S20’s battery isn’t lasting as long as it used to, don’t worry! You can fix it by replacing the battery. This guide will teach you everything you need to know. Just follow along, and soon your phone will be back to full power. If you’re nervous about doing it yourself, don’t hesitate to get help from a professional. With Screen Fixed as your guiding light, your Galaxy S20 shall emerge from the shadows, prepared to conquer the challenges that lie ahead.